
Taylor K-2005C Pool Water Test Instructions
Sanitizer colors above the comparator scale can be checked with documented approximate twofold and fivefold dilution methods.
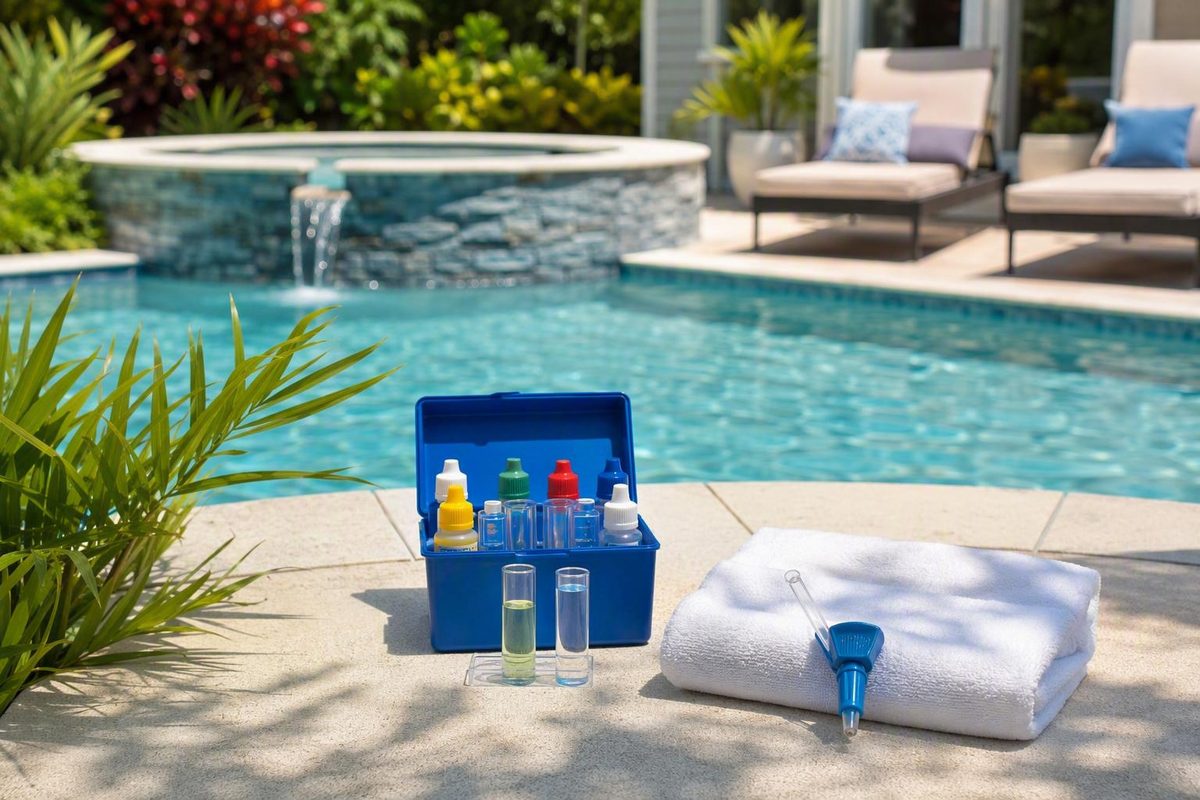
The Taylor K-2005C is described as the service-size version of the K-2005, with 2-ounce reagent bottles and the same listed analytes and test ranges. However, the strongest detailed procedures available here are reproduced as K-2005 instructions or appear in a third-party-hosted document whose URL identifies K-2005C. This guide therefore explains documented K-2005-style methods applicable to the listed K-2005C tests; it is not a replacement for the current instructions packaged with your exact kit.
Before testing, compare every reagent number, comparator scale, sample fill line, and procedure below with the labels and instructions in your kit. If anything differs, follow the materials supplied with your kit.
Before You Begin: Confirm the Kit, Reagents, and Test Methods
This guide covers the following supported tests:
- Free chlorine
- Total chlorine
- Calculated combined chlorine
- Total bromine
- pH
- Acid demand
- Base demand
- Total alkalinity
- Calcium hardness
- Cyanuric acid
Salt is deliberately excluded. Although salt-testing directions appear in one broader instruction document, the evidence does not establish that salt reagents are standard in every K-2005C configuration.
The model relationship and the documented test values summarized below come from Taylor’s 2000 Series materials and the associated representative K-2005 procedures. Review the Taylor 2000 Series brochure and instruction excerpt.
| Test | Sample volume | Reagent sequence | Endpoint or reading method | Calculation | Reported unit |
|---|---|---|---|---|---|
| Free chlorine | 9 mL | 5 drops R-0001, then 5 drops R-0002 | Match DPD chlorine scale | Direct reading | ppm free chlorine |
| Total chlorine | Same treated 9 mL sample | Add 5 drops R-0003 | Match color immediately | Direct reading | ppm total chlorine |
| Combined chlorine | No new sample | Use recorded free and total chlorine | Calculated result | Total chlorine − free chlorine | ppm combined chlorine |
| Total bromine | Fresh 9 mL | 5 drops R-0001, then 5 drops R-0002 | Match bromine scale | Direct reading | ppm total bromine |
| pH | 44 mL | 5 drops R-0004 | Match pH scale | Average adjacent marks if needed | pH units |
| Acid demand | Retained pH sample | Add R-0005 dropwise | Stop at desired pH color | Record drops; consult treatment table | Drops |
| Base demand | Retained pH sample | Add R-0006 dropwise | Stop at desired pH color | Record drops; consult treatment table | Drops |
| Total alkalinity, standard | 25 mL | 2 drops R-0007; 5 drops R-0008; titrate with R-0009 | Green to red | R-0009 drops × 10 | ppm as CaCO₃ |
| Total alkalinity, high range | 10 mL | 1 drop R-0007; 3 drops R-0008; titrate with R-0009 | Green to red | R-0009 drops × 25 | ppm as CaCO₃ |
| Calcium hardness, standard | 25 mL | 20 drops R-0010; 5 drops R-0011L; titrate with R-0012 | Red to blue | R-0012 drops × 10 | ppm as CaCO₃ |
| Calcium hardness, high range | 10 mL | 10 drops R-0010; 3 drops R-0011L; titrate with R-0012 | Red to blue | R-0012 drops × 25 | ppm as CaCO₃ |
| Cyanuric acid | 7 mL in bottle #9191; R-0013 to 14 mL | Pool water, then R-0013 | Black dot just disappears | Read scale at liquid level | ppm cyanuric acid |
Do not use K-2006C FAS-DPD powder-and-titrant instructions as though they were the standard K-2005C chlorine procedure. The K-2005C method covered here uses liquid DPD reagents and visual color matching. FAS-DPD testing requires different or additional reagents and a different endpoint procedure.
The table is a reference, not a substitute for reading each complete procedure. The most consequential mistakes are using the wrong fill line, confusing the standard and high-range multipliers, or continuing a titration after its specified endpoint.
Pre-Test Checklist: Collect and Handle the Sample Correctly
Reliable results begin before the first reagent drop. Taylor’s general guidance recommends checking expiration dates, sampling away from return lines at approximately elbow depth, filling to the specified line, using the prescribed mixing method, and reading comparator colors at eye level. It also recommends test water between 50°F and 90°F while directing users to their kit-specific instructions. Review Taylor Technologies’ general liquid-test-kit procedure.
Use this checklist before each testing session:
-
Inspect every reagent. Check its expiration date, color, clarity, and consistency. Replace a bottle that is expired, visibly deteriorated, contaminated, or otherwise suspect according to its label and the kit instructions.
-
Rinse the equipment. Rinse the appropriate tube, comparator, cap, or dispensing bottle before testing and again immediately afterward.
-
Collect a representative sample. The sources describe the depth as 12–18 inches, 18 inches, or elbow-deep. These descriptions are broadly consistent: collect below the immediate surface and away from return jets or other locations where recently introduced water could distort the result.
-
Use the exact fill line. Do not estimate 9, 10, 25, or 44 mL when the vessel provides a marked line. Sample volume determines the test’s effective concentration and, for titrations, the correct multiplier.
-
Hold bottles vertically. Let each drop form and fall naturally. Do not angle the bottle, force irregular drops, or touch the tip to the sample, tube, cap, or comparator.
-
Use the specified mixing action. For comparator tests, add reagents in order, cap the vessel, and gently invert it. For titrations, add one drop at a time while counting and gently swirling.
-
Prepare consistent viewing conditions. Read comparator colors at eye level in natural or indirect natural light. Using a white or neutral background is helpful third-party guidance, not a special K-2005C requirement.
-
Consider sample temperature. Taylor’s general guidance recommends water between 50°F and 90°F. Separate third-party guidance warns that reactions may be delayed below 45°F, particularly in cyanuric-acid and titration tests. These figures are guidance, not a universal K-2005C operating limit.
-
Avoid obviously disturbed conditions. Taylor advises against testing immediately after a chemical addition or while it is raining because results may be skewed. Do not invent one waiting period for every product; follow the chemical label, circulation directions, and kit documentation.
-
Prepare a written record. Record the method and multiplier as well as the result, especially for high-range alkalinity and hardness tests.
A compact log helps prevent transcription and multiplier errors:
Date | Time | Water/weather conditions | FC | TC | CC | pH | TA and method | CH and method | CYA
Use abbreviations consistently: FC for free chlorine, TC for total chlorine, CC for combined chlorine, TA for total alkalinity, CH for calcium hardness, and CYA for cyanuric acid.
Free, Total, and Combined Chlorine—and Total Bromine
The standard K-2005-style sanitizer method uses liquid DPD reagents and a visual comparator. Free and total chlorine form one continuous workflow, while bromine requires a fresh sample. The same documented instructions provide approximate twofold and fivefold dilution methods for sanitizer colors above the comparator scale. See the hosted instruction sheet for the sample volumes, reagent counts, calculations, and dilution procedures.
Free chlorine
- Rinse the small comparator tube.
- Fill it to the 9 mL mark with pool water.
- Add 5 drops R-0001.
- Add 5 drops R-0002.
- Cap and gently invert the comparator.
- Match the developed color to the DPD chlorine scale.
- Record the result as ppm free chlorine.
View the comparator straight on under suitable light. If the color falls between scale marks, record a reasonable visual estimate rather than implying more resolution than the scale provides.
Total chlorine
Keep the free-chlorine sample:
- Add 5 drops R-0003.
- Cap and gently invert.
- Match the color immediately.
- Record the result as ppm total chlorine.
This is a time-sensitive continuation of the free-chlorine test, so have your log ready before adding R-0003.
Combined chlorine
Combined chlorine is calculated rather than read with a separate comparator test:
Combined chlorine = total chlorine − free chlorine
Example:
- Free chlorine: 2 ppm
- Total chlorine: 3 ppm
- Combined chlorine: 3 − 2 = 1 ppm
If color-matching uncertainty produces a small negative result, do not report negative combined chlorine. Repeat the complete test with a fresh sample, consistent lighting, and verified, in-date reagents.
Total bromine
Use a fresh sample rather than the chlorine sample treated with R-0003:
- Rinse and fill the small tube to 9 mL.
- Add 5 drops R-0001.
- Add 5 drops R-0002.
- Cap and gently invert.
- Match the result against the bromine scale, not the chlorine scale.
- Record ppm total bromine.
When the sanitizer color is above the scale
If the developed color exceeds the comparator scale, use the documented approximate dilution procedure.
Twofold dilution
- Measure 4.5 mL of pool water into the small tube.
- Add the dilution water specified by your kit until the level reaches 9 mL.
- Perform the normal sanitizer test.
- Multiply the displayed reading by 2.
A diluted reading of 4 ppm represents approximately:
4 × 2 = 8 ppm
Fivefold dilution
If the first diluted sample remains off-scale:
- Measure 1.8 mL of pool water.
- Add the specified dilution medium to the 9 mL mark.
- Perform the normal sanitizer test.
- Multiply the reading by 5.
A diluted reading of 3 ppm represents approximately:
3 × 5 = 15 ppm
Mark every diluted result as approximate. Measurement and color-matching errors are magnified by the multiplier, so dilution is less precise than an in-range direct reading.
The evidence conflicts over the correct dilution medium. The procedural documents specify tap water, while a participant in an archived forum discussion specifies distilled water. Follow the directions supplied with your own comparator rather than treating either statement as universally applicable.
When the sample remains unexpectedly clear
A clear DPD sample may indicate little or no measurable chlorine, but it does not necessarily prove zero chlorine when a high concentration is plausible. An archived third-party discussion reports that very high chlorine may bleach the DPD color, making an elevated sample appear colorless; it also notes that dilution reduces precision. See the archived discussion comparing DPD color matching with FAS-DPD testing.
If recent treatment, operating history, or another result makes a high level plausible:
- Repeat with a fresh sample and verified, in-date reagents.
- Confirm the reagent order and drop counts.
- Inspect the comparator and reagent bottles for contamination or deterioration.
- Follow the dilution directions supplied with your kit.
- If available and compatible, verify the result with a separately instructed FAS-DPD test.
No official bleaching threshold is established here. Verify an implausible clear result before making a chemical adjustment.
pH, Acid Demand, and Base Demand
The documented K-2005-style method uses the large comparator tube, a 44 mL sample, and R-0004 phenol red. The acid- and base-demand tests reuse that treated sample. Their outputs are drop counts that must be interpreted with an applicable treatment table; the counts are not chemical doses by themselves. The Taylor instruction excerpt documents the pH volume, reagent, demand-test sequence, and need for treatment tables.
pH
- Rinse the large comparator tube.
- Fill it to the 44 mL mark.
- Add 5 drops R-0004.
- Cap and gently invert.
- Compare the sample with the pH scale.
- Record the result in pH units.
- Retain the sample if an acid- or base-demand test is needed.
If the color lies between two marked values, average the adjacent readings. A color halfway between 7.4 and 7.6 can be recorded as approximately 7.5.
Taylor 2000-series comparators use R-0004 for this procedure. Do not substitute R-0014 merely because both are phenol-red reagents; third-party testing guidance associates R-0014 with 1000-series comparators and says the two are not interchangeable.
Acid demand
Use this continuation when comparing the sample with a lower desired pH color:
- Keep the sample already treated with R-0004.
- Add R-0005 one drop at a time.
- Count every drop.
- Mix after each addition.
- Compare the sample with the pH scale after each drop.
- Stop when the desired pH color is reached.
- Record the number of R-0005 drops.
Base demand
Use this continuation when comparing the sample with a higher desired pH color:
- Keep the sample already treated with R-0004.
- Add R-0006 one drop at a time.
- Count every drop.
- Mix after each addition.
- Compare the sample with the scale after each drop.
- Stop when the desired pH color is reached.
- Record the number of R-0006 drops.
A demand-test count does not independently show how much acid, base, or other product to add. Converting drops into treatment requires the correct Taylor treatment table, pool volume, and exact product information. Those data are not supplied here, so do not improvise a dose.
Trouble Free Pool’s third-party testing guidance cautions that total chlorine above approximately 10 ppm may cause phenol red to indicate a falsely high pH. Treat that figure as a troubleshooting warning, not an official K-2005C cutoff. It also distinguishes R-0004 from R-0014. Review the third-party water-testing guidance.
Total Alkalinity: Standard and High-Range Procedures
Total alkalinity is measured by drop-count titration. The standard and high-range procedures have the same green-to-red endpoint but use different sample volumes, initial reagent quantities, and multipliers. Decide which method you are running before filling the tube.
Standard procedure
- Rinse the large tube.
- Fill it to 25 mL.
- Add 2 drops R-0007 and swirl.
- Add 5 drops R-0008 and swirl; the sample should turn green.
- Add R-0009 one drop at a time.
- Count each R-0009 drop and swirl after every addition.
- Stop when the color changes from green to red.
- Multiply the R-0009 drop count by 10.
- Report total alkalinity as ppm calcium carbonate, or ppm as CaCO₃.
Example:
- R-0009 used: 9 drops
- Calculation: 9 × 10
- Total alkalinity: 90 ppm as CaCO₃
The endpoint is the specified green-to-red transition—not the darkest red obtainable. Adding titrant merely to deepen the final color can overstate the result.
High-range procedure
When high total alkalinity is anticipated:
- Fill the tube to 10 mL, not 25 mL.
- Add 1 drop R-0007 and swirl.
- Add 3 drops R-0008 and swirl.
- Add R-0009 one drop at a time while counting and swirling.
- Stop at the same green-to-red endpoint.
- Multiply the R-0009 drop count by 25.
- Report the result as ppm total alkalinity as CaCO₃.
Example:
- R-0009 used: 8 drops
- Calculation: 8 × 25
- Total alkalinity: 200 ppm as CaCO₃
| Alkalinity method | Sample | R-0007 | R-0008 | R-0009 endpoint | Multiplier |
|---|---|---|---|---|---|
| Standard | 25 mL | 2 drops | 5 drops | Green to red | × 10 |
| High range | 10 mL | 1 drop | 3 drops | Green to red | × 25 |
These volumes, reagent quantities, endpoints, and multipliers are the documented standard and high-range K-2005-style procedures. Always compare them with the instructions enclosed with your kit.
Mark the log as standard or high range. If you cannot remember which sample volume you used, discard the result and repeat the test rather than guessing which multiplier applies. This procedure provides a measurement; it does not establish a universal ideal alkalinity range or treatment dose.
Calcium Hardness: Standard and High-Range Procedures
Calcium hardness is also measured by drop-count titration, but its reagents and endpoint differ from the alkalinity test. The counted titrant is R-0012, and the specified color transition is red to blue.
| Standard calcium hardness | High-range calcium hardness | |
|---|---|---|
| Sample volume | 25 mL | 10 mL |
| R-0010 | 20 drops | 10 drops |
| R-0011L | 5 drops | 3 drops |
| Titrant | R-0012 | R-0012 |
| Endpoint | Red to blue | Red to blue |
| Multiplier | × 10 | × 25 |
Changing the sample volume also changes the indicator quantities and multiplier. Do not combine the 25 mL reagent counts with the 10 mL multiplier—or vice versa.
Standard procedure
- Rinse the large tube.
- Fill it to 25 mL.
- Add 20 drops R-0010 and swirl.
- Add 5 drops R-0011L and swirl again.
- Add R-0012 one drop at a time, counting every drop.
- Swirl after each addition.
- Stop when the sample changes from red to blue.
- Multiply the R-0012 drop count by 10.
- Report calcium hardness in ppm as CaCO₃.
Example:
- R-0012 used: 24 drops
- Calculation: 24 × 10
- Calcium hardness: 240 ppm as CaCO₃
High-range procedure
When high calcium hardness is anticipated:
- Use a 10 mL sample.
- Add 10 drops R-0010 and swirl.
- Add 3 drops R-0011L and swirl.
- Add R-0012 one drop at a time while counting and swirling.
- Stop at the red-to-blue endpoint.
- Multiply the R-0012 drop count by 25.
- Report calcium hardness in ppm as CaCO₃.
Example:
- R-0012 used: 16 drops
- Calculation: 16 × 25
- Calcium hardness: 400 ppm as CaCO₃
The standard quantities and red-to-blue endpoint are also documented in third-party extended testing guidance; the high-range values above come from the K-2005-style kit instructions summarized earlier. Review the extended calcium-hardness testing procedure.
If you lose count, several drops enter together, or you continue well beyond the endpoint, discard the sample, rinse the tube, and repeat. Do not reconstruct the result from memory. The test measures calcium hardness but does not establish a universal target or provide directions for adding or reducing calcium.
Cyanuric Acid: Performing the Black-Dot Test Consistently
The cyanuric-acid test is a turbidity test rather than a color-comparator match or drop titration. The treated sample becomes cloudy, and the endpoint occurs when the black dot at the bottom of the view tube just disappears.
Follow the documented sequence:
- Rinse dispensing bottle #9191.
- Fill it to the 7 mL mark with pool water.
- Add R-0013 until the mixture reaches the 14 mL mark.
- Cap the bottle.
- Mix for 30 seconds.
- Slowly transfer the cloudy mixture into the small comparator or view tube.
- Look down into the tube from directly above while pouring.
- Stop when the black dot at the bottom just disappears.
- Read the cyanuric-acid scale at the liquid level on the back of the comparator block.
- Record the result in ppm.
These bottle marks, the 30-second mixing time, and the black-dot endpoint are specified in the third-party-hosted instruction document. Review the documented cyanuric-acid procedure.
The endpoint is not “when the tube is full.” If the dot disappears before the tube is full, stop and read the scale at that liquid level.
Because the result depends on visual judgment, use consistent lighting, viewing angle, pouring speed, and interpretation of “just disappears.” Do not alternate among direct sun, deep shade, and indoor artificial light while expecting identical readings.
The K-2005-style procedure specifies 30 seconds of mixing. Trouble Free Pool’s separate third-party method suggests waiting another two to three minutes after mixing. Do not casually combine the two methods; use the timing stated in the instructions packaged with your kit.
Cold water may delay reactions, and third-party guidance specifically identifies cyanuric-acid testing as susceptible to low-temperature effects. If a cold-water result appears implausible, consult your kit instructions and repeat under consistent conditions rather than inventing a K-2005C-specific temperature rule.
No high-cyanuric-acid dilution method is supplied here because the available third-party procedure is incomplete. This guide also does not prescribe a universal CYA target range.
Troubleshooting, Cleanup, Storage, and K-2005C Limitations
When a result looks wrong, investigate the testing process before attempting a chemical correction. Repeating the test with a clean vessel, fresh sample, and verified, in-date reagents is usually more useful than trying to repair an uncertain reading mathematically.
| Problem | Possible testing concern | What to do |
|---|---|---|
| Sanitizer color is above the scale | Concentration exceeds the direct visual range | Use the documented approximate 4.5-to-9 mL dilution and multiply by 2; if still off-scale, use 1.8-to-9 mL and multiply by 5 |
| Chlorine sample is unexpectedly clear | Little chlorine, deteriorated reagents, procedural error, or possible high-level DPD bleaching | Repeat with a fresh sample and verified reagents; check by the kit-specific dilution method or compatible FAS-DPD testing before assuming zero |
| Comparator shade is ambiguous | Lighting, viewing angle, background, or limits of visual matching | Use indirect natural light, view at eye level against a neutral background, and repeat with a fresh sample |
| Cold-water reaction appears delayed | Low temperature may slow some reactions | Consult the kit instructions and repeat under suitable, consistent test conditions without contaminating the sample |
| Drops vary in size | Bottle is angled, squeezed inconsistently, or the tip is contaminated | Hold the bottle vertically, let drops form naturally, and keep the tip from touching any surface |
| Titration endpoint was overshot | Drops were added too quickly or testing continued to deepen the final color | Discard, rinse, refill, and repeat one drop at a time |
| Drop count was lost | Recording or concentration lapse | Repeat the test; do not estimate |
| Test followed a chemical addition | The sample may not represent evenly circulated water | Follow the product label and kit instructions; retest after appropriate circulation without inventing a universal waiting period |
| Repeated results disagree | Inconsistent volume, lighting, mixing, temperature, or reagent condition | Standardize each variable and repeat using the exact fill line and sequence |
K-2005C DPD versus K-2006C FAS-DPD
The K-2005C procedure covered here develops a DPD color and compares it visually with a scale. The K-2006C FAS-DPD method instead uses powder and a drop titration to a colorless endpoint. They are not interchangeable procedures.
As third-party context, a compatible standalone FAS-DPD test may supplement a K-2005-style kit when comparator shades are difficult to distinguish or elevated chlorine needs verification. Compatibility must be confirmed from current product instructions, not old package descriptions or pricing. The archived comparison explains the procedural distinction and discusses standalone FAS-DPD supplementation.
Cleanup and storage
After each testing session:
- Rinse the tubes, comparator, caps, and dispensing bottle as appropriate.
- Never pour treated test solutions back into the pool or spa.
- Tighten every reagent cap.
- Wipe away external drips without touching one reagent’s tip to another surface.
- Return bottles to their assigned positions.
- Store the kit in a cool, dry, dark location away from direct sunlight and heat.
- Keep the kit out of children’s reach.
- Follow every precaution printed on the reagent labels.
The hosted instructions specifically direct users to read label precautions, keep the kit away from children, and avoid disposing of test solutions in the pool or spa. Reagent labels and the instructions packaged with the kit remain the controlling safety directions.
Check expiration dates and reagent appearance before use. Available guidance variously recommends replacement annually or at the beginning of a swim season, with earlier replacement if a reagent’s color or texture changes. Taylor’s general guide also instructs users to keep bottles tightly closed and protect the kit from heat and direct sunlight. Review Taylor’s reagent-handling and storage guidance.
Important limitations remain:
- The available evidence does not provide the treatment tables needed to convert acid- or base-demand drops into chemical doses.
- It does not establish universal chemistry targets for every pool.
- It does not establish one waiting time after every type of chemical addition.
- It does not confirm the current contents of every K-2005C package.
- It does not resolve the dilution-medium disagreement for every current comparator.
- It does not establish an official chlorine concentration at which DPD bleaching always occurs.
A Repeatable K-2005C Testing Routine
Use the same sequence each time:
- Verify the kit, comparator, and reagents.
- Collect a representative sample below the surface and away from return lines.
- Fill to the exact line for the selected method.
- Add the correct reagents in the documented order.
- Mix using the specified action.
- Read the endpoint promptly and under consistent viewing conditions.
- Apply the multiplier that matches the sample volume.
- Record both the result and the method used.
- Rinse the equipment.
- Cap and store the reagents correctly.
These Taylor K 2005C instructions for testing pool water explain the supported K-2005-style procedures, but they do not replace the instructions supplied with your exact kit or the applicable Taylor treatment tables. Verify uncertain, off-scale, or unexpectedly clear sanitizer results before making any chemical adjustment.
Frequently Asked Questions
What is the difference between the Taylor K-2005 and K-2005C?
The available model description identifies the K-2005C as the service-size version with 2-ounce reagent bottles, while the K-2005 uses smaller 0.75-ounce bottles. The two models are listed with the same analytes and ranges.
That supports using the documented K-2005-style procedures as a practical guide to the listed K-2005C tests, but it does not prove that bottle size is the only possible difference in every current package. Compare your actual reagents, comparator, fill lines, and enclosed instructions before testing.
How do I calculate combined chlorine with the K-2005C?
First measure free chlorine from a 9 mL sample treated with 5 drops each of R-0001 and R-0002. After recording free chlorine, add 5 drops R-0003 to the same sample, mix, and read total chlorine immediately.
Then calculate:
Combined chlorine = total chlorine − free chlorine
For example, 3 ppm total chlorine minus 2 ppm free chlorine equals 1 ppm combined chlorine.
What should I do if the chlorine color is above the comparator scale or remains unexpectedly clear?
For an off-scale color, follow the documented approximate dilution procedure:
- Dilute 4.5 mL of sample to 9 mL, test normally, and multiply the reading by 2.
- If it remains off-scale, dilute 1.8 mL to 9 mL and multiply the reading by 5.
Use the dilution medium specified by your kit and label the result approximate.
If the sample remains unexpectedly clear when high chlorine is plausible, do not assume zero chlorine. Repeat with a fresh sample and verified, in-date reagents, confirm the procedure, and check the result using the kit-specific dilution directions or a compatible FAS-DPD test.
Can I use K-2006C FAS-DPD chlorine instructions with a standard K-2005C?
No. The standard K-2005C method covered here uses R-0001 and R-0002 to produce a comparator color, followed by R-0003 for total chlorine.
K-2006C FAS-DPD testing uses different or additional reagents and a titration endpoint. A compatible standalone FAS-DPD test may supplement a K-2005-style kit, but it must be performed according to its own current instructions.
Where do I find the chemical doses for the acid-demand and base-demand results?
Use the applicable Taylor treatment table or guide supplied for your kit, together with the pool volume and exact chemical product information. The R-0005 or R-0006 drop count alone is not a dose.
Do not invent a conversion ratio. If the necessary table is missing, obtain the correct current documentation before making an adjustment, and verify any questionable sanitizer or pH result first.