
How to Change Pool Filter Sand: What Your Model Changes
Before you open the tank, use the filter manual to confirm the approved media and quantity, access steps, pressure-release procedure and startup sequence.
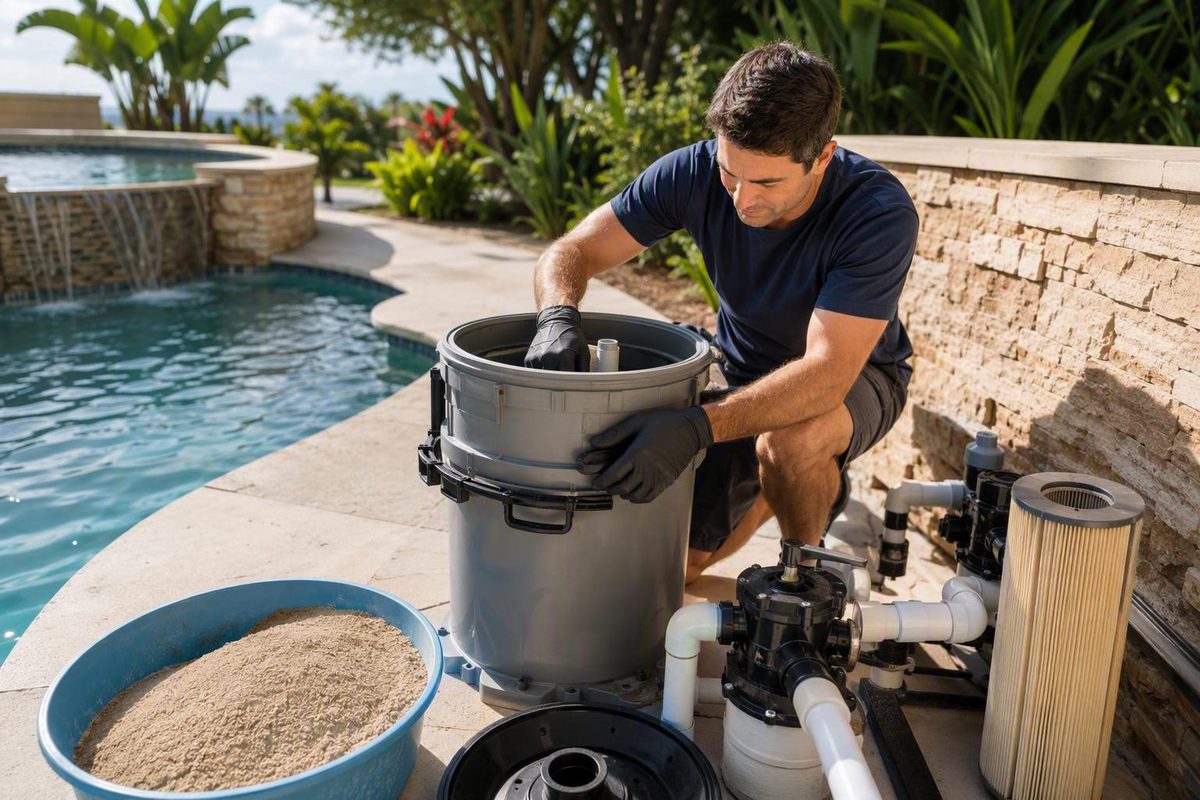
Learning how to change pool filter sand is less about removing old media and pouring in new material than it is about protecting the filter’s internal components. The center standpipe and laterals may be fragile, media requirements vary by model, and the tank must not be opened while it contains trapped pressure.
This article is a general overview based on commercial pool-maintenance guidance. It is not a substitute for the instructions issued for your filter, valve, pump, or electrical system. Do not begin until you have identified the exact filter and obtained its manual, approved media specification, required quantity, access procedure, pressure-release procedure, and startup sequence.
Once those details are confirmed, the broad workflow is:
- Diagnose the filtration problem.
- Identify the filter and media requirements.
- Shut down the system using its documented procedure.
- Release pressure and drain the tank as directed.
- Open the filter without forcing the valve or plumbing.
- Protect the standpipe and remove the old media.
- Inspect the laterals, standpipe, seals, and tank components.
- Add the specified replacement media.
- Reassemble and restore power in a controlled sequence.
- Backwash, rinse if applicable, return to Filter, and verify operation.
Confirm That the Filter Sand Actually Needs Replacing
Cloudy water, frequent backwashing, rapidly returning pressure, and disappointing filtration can justify investigating the media. None of these symptoms proves by itself that the sand is exhausted.
Before opening the tank:
- Test and correct the water chemistry.
- Confirm adequate circulation throughout the pool.
- Verify that the pump runs long enough for current conditions.
- Empty pump and skimmer baskets.
- Check for obvious suction- or return-side restrictions.
- Confirm that routine backwashing has been performed correctly.
- Clean the filter only by a method permitted by its manufacturer.
- Check the pump, valves, pressure gauge, and connected equipment.
- Consider whether the filter and pump are appropriately matched.
If normal performance returns after backwashing, permitted cleaning, or correcting chemistry and circulation, continue routine maintenance and monitor the filter’s clean-pressure baseline. If pressure rises rapidly again or the water remains difficult to clear, consult the manual and inspect the system before concluding that new media is required.
Age provides context, not a verdict. One commercial maintenance guide gives a general range of approximately three to five years or longer, depending on performance and maintenance. Leslie’s describes this variable service range.
Other retailer guidance commonly mentions five to seven years while still advising owners to prioritize actual performance and manufacturer instructions. In The Swim discusses that longer general range. These conflicting estimates are a reason not to treat any calendar interval as universal.
Replacing the media without locating the fault may simply send the new material into the pool.
Use this decision path:
- Performance improves after maintenance: Continue operating the filter and record its clean-pressure baseline.
- Cloudiness or rapidly rising pressure persists: Recheck chemistry, circulation, pump runtime, valve position, cleaning history, and equipment condition before inspecting the media.
- Sand appears at the returns: Prepare to inspect and possibly repair the internal distribution system rather than replacing media alone.
- The filter works normally but has reached a generic age estimate: Follow its manual instead of opening it solely because of the calendar.
Identify the Filter and Build a Model-Specific Job Sheet
Find the equipment label on the tank, valve, or associated documentation. Photograph the complete label before ordering media or parts.
If the paper manual is missing, search the manufacturer’s official support site using the full model number and size designation. Compare the downloaded document with the tank label, valve arrangement, port layout, and any revision markings. If the label is unreadable or two documents conflict, contact the manufacturer before proceeding.
Record the following:
| Item | What to record |
|---|---|
| Manufacturer | Full brand name |
| Filter model | Complete model number and size designation |
| Valve arrangement | Top-mounted multiport, side-mounted valve, or separate access lid |
| Valve model | Model or revision if separately labeled |
| Approved media | Exact specification stated for the filter |
| Media quantity | Required weight or documented fill level |
| Free space | Required space above the completed media bed |
| Access method | Clamp, bolted lid, dome, valve flange, or another arrangement |
| Pressure release | Exact control and sequence specified by the manual |
| Internal parts | Standpipe, lateral assembly, diffuser, drain parts, and part numbers |
| Seals | Valve, lid, drain, and plumbing seals needed for service |
| Startup procedure | Backwash, rinse, priming, and valve sequence |
| Pressure guidance | Clean-pressure baseline and documented backwash threshold |
A top-mounted multiport valve sits over the tank opening and often connects to the center standpipe. Removing it may require disconnecting the pump, return, and waste plumbing before releasing the valve clamp.
A side-mounted valve connects through the tank wall, while the media may be reached through a separate lid or dome. This visual distinction helps identify the configuration, but it does not establish how every model should be opened. Do not copy top-mount disassembly steps when working on a side-mount or lid-access design.
Do not borrow capacities from a filter that merely looks similar. One published example for a Hayward S180T uses three 50-pound bags—150 pounds total—and specifies at least six inches of space above the sand. Those figures apply to that illustrated configuration, not to residential filters generally. INYOPools documents the model-specific example.
Use only media approved for the exact filter. Several general guides refer to high-rate No. 20 silica pool-filter sand, but that does not establish one universal specification for every model.
Do not substitute:
- Play sand
- Masonry sand
- Beach sand
- Ungraded or generic silica sand
- Any other ordinary sand not approved for the filter
The grading and particle distribution affect how the media behaves inside the tank. A product containing silica is not necessarily pool-filter media.
Alternative media require the same discipline. Before using glass, zeolite, filter balls, gravel, or another substitute, obtain written compatibility, loading, and quantity instructions for both:
- The exact filter model; and
- The selected media product.
Do not rely on a generic conversion ratio. Retailer performance claims do not replace the instructions from the filter and media manufacturers.
Postpone the job if you cannot confirm the approved media, quantity, required free space, opening method, pressure-release procedure, or startup sequence.
Gather Tools, Parts, and Protective Equipment Before Shutdown
Assemble everything before taking the circulation system out of service.
Media and removal equipment
- Manufacturer-approved media in the exact required quantity
- Wet/dry vacuum suitable for the work, or a plastic scoop
- Several manageable buckets or containers
- Garden hose with a controllable nozzle
- Manufacturer-supplied sand shield or another secure standpipe cover permitted for the model
- Hand tools appropriate for the clamp, lid, valve, and plumbing
- Towels or absorbent material for residual water
- Labels or tape for identifying plumbing connections
- A clear, stable work area around the filter
Likely service parts
- Correct valve or lid O-ring
- Correct drain-plug seal or O-ring
- Other model-specific gaskets
- Compatible silicone pool lubricant, if permitted
- Confirmed replacement laterals or other internal parts
- Plumbing seals or materials required by the documented configuration
Do not buy laterals based on appearance alone. A similar-looking part may have different threads, dimensions, slots, or attachment points. Match the filter model and replacement part number.
Plan for the old media before opening the tank. Wet sand is difficult to move in bulk, so use containers you can handle safely and determine where the material may be disposed of under local rules. Do not plan to tip the filter into a wheelbarrow or use the tank as a movable dumping vessel.
Minimize airborne dust while opening and loading dry media. Follow the media packaging, available safety information, and manufacturer instructions for respiratory, eye, hand, skin, and foot protection. A commercial maintenance guide recommends eye and respiratory protection, covered skin, gloves, and protective footwear when handling dusty media or reaching into a filter tank. Leslie’s outlines these precautions.
Arrange professional help before shutdown if:
- You cannot identify the filter or approved media.
- The exact pressure-release procedure is unavailable.
- You cannot prevent an unexpected pump restart.
- You are uncertain how to isolate electrical power safely.
- The plumbing prevents safe access.
- Disassembly would require unfamiliar PVC cutting.
- The tank, clamp, lid, or valve appears cracked or distorted.
- You cannot safely remove and handle the wet media.
Shut Down, Depressurize, Drain, and Open the Filter
A sand filter operates under pressure. Never release the tank clamp, remove the access lid, or separate the valve from the tank until the pump is off and the exact model’s procedure confirms that trapped pressure has been released.
The component used to release pressure or drain the tank is model-dependent. Some designs use a dedicated air-relief control; others have different documented arrangements. Do not guess which plug, cap, valve, or fitting performs that function.
Use the filter, valve, pump, and electrical-equipment instructions to complete this general sequence:
- Stop the pump.
- Disable the timer or automation to prevent an unexpected restart.
- Isolate electrical power as required by the equipment instructions.
- Position applicable isolation valves as documented.
- Use the filter’s specified pressure-release procedure.
- Verify pressure release by the method stated in the manual.
- Operate or remove the documented drain component.
- Allow the tank to drain fully.
Commercial replacement guides consistently call for stopping and disconnecting pump power, releasing filter pressure, and draining the tank before opening it. They also state that multiport settings should be changed only while the pump is stopped. BlueStars Parts summarizes this general sequence.
If the gauge does not respond as expected, the relief control behaves abnormally, or the specified method does not confirm that pressure is gone, stop. Switching off the pump alone does not verify that the tank is ready to open.
Opening a top-mounted filter
First determine whether the plumbing uses unions, flexible hoses, or hard-glued PVC.
With unionized plumbing, label the connections if needed and disconnect them according to the manual. Support the pipes so their weight does not pull against the valve. Release the valve clamp or fasteners only after completing the documented depressurization and draining procedure.
Lift the valve gently and as vertically as the configuration permits. The valve may engage the center standpipe. Do not yank, pry, or use the plumbing as a lever. Excessive force can disturb or damage the standpipe and lateral assembly. Retailer service guidance likewise cautions against forceful top-valve removal and describes the possibility of plumbing disconnection before access. In The Swim explains this top-mount configuration.
A hard-plumbed top valve without unions may not have enough clearance for removal. Pipe cutting and later reconnection may be necessary. If you cannot confidently plan, cut, align, join, and test the PVC plumbing, use a qualified pool or plumbing professional.
Opening a side-mounted or lid-access filter
Follow the exact procedure for the lid, dome, diffuser, clamp, air-relief assembly, and side-mounted valve. Photograph the orientation of removable parts before moving them.
Do not proceed if:
- Pressure release cannot be verified.
- The clamp, lid, tank, or valve is damaged.
- Fasteners are severely corroded.
- Plumbing has to be bent or forced.
- The documented access procedure does not match the equipment.
Cover the Standpipe, Remove the Old Sand, and Inspect the Internals
As soon as the center standpipe is accessible, cover it securely using the manufacturer-supplied shield or another method permitted for the model. The cover must not be able to fall into the pipe. Its purpose is to prevent media from entering the internal distribution system.
Remove the old media gradually:
- Vacuum or scoop material from the top of the bed.
- Use plastic tools rather than sharp metal implements.
- Transfer media into manageable containers.
- Keep checking the standpipe cover.
- Work more slowly near the bottom.
- Do not tip or overturn the tank.
The laterals may remain hidden until most of the media has been removed, and older components may be brittle. Avoid driving a vacuum nozzle or tool into unseen parts. Commercial maintenance guidance specifically recommends controlled removal and warns that tipping a tank can cause the media to fall against the laterals.
Once most of the media is gone, rinse residue from the tank walls. Remove the resulting water and loose material without allowing it to enter the uncovered standpipe. Expose the accessible distribution assembly, drain components, and fittings.
Inspect:
- Laterals: Look for cracks, splits, bending, displacement, brittle material, broken connections, and severe blockage.
- Standpipe: Check for cracks, distortion, damaged ends, and incorrect seating.
- Distribution assembly: Confirm that connected parts are secure and oriented as shown in the manual.
- Drain components: Check the fitting, plug, threads, and seal.
- Valve or lid seal: Look for cuts, flattening, stretching, hardening, and embedded debris.
- Clamp and fasteners: Check for cracks, distortion, corrosion, and damaged threads.
- Sealing surfaces: Remove sand and inspect for gouges or other damage.
- Accessible fittings and gaskets: Replace components that cannot form a reliable seal.
Replace cracked, bent, displaced, brittle, or otherwise questionable laterals with confirmed model-specific parts. Reassembling around a damaged component may require repeating the entire job after the tank is filled.
Confirm that the standpipe is seated as shown in the manual. Do not use it as a handle or force it sideways. Substantial repositioning may affect its connection to the lateral hub or underdrain.
Do not use a generic acid or chemical soak on blocked components. The available guidance does not establish one universally safe chemical, concentration, exposure period, compatibility rule, or disposal method. Use only a manufacturer-approved cleaning procedure; otherwise, replace the questionable part.
Refill the Tank Without Overloading the Laterals
Reinstall the approved lateral assembly, drain components, and other internal parts according to the model manual. Some laterals rotate or fold for insertion, while others attach individually. Confirm that every component is secured in its operating position.
Before loading media, verify that the standpipe is:
- Fully seated
- Centered as required
- Covered by a secure shield that cannot fall inside
Partly fill the tank with water before adding media if the exact filter instructions call for it. General pool-maintenance guides commonly describe filling the tank about halfway so the water cushions the lateral assembly as dry media falls, but the model manual should determine the actual level. Swimmingpool.com describes the commonly recommended halfway fill.
Add the media slowly:
- Open bags carefully to reduce dust.
- Pour a small amount at a time.
- Distribute it evenly around the standpipe.
- Avoid dropping a full bag onto one side.
- Pause to confirm that the standpipe remains centered and seated.
- Keep its cover in place throughout loading.
- Do not pull, push, or lean on the standpipe.
Use the manufacturer-specified weight or fill level. Do not estimate capacity from tank diameter, another model, or the amount removed. Previous underfilling, lost media, retained water, and undocumented substitutions can make the old quantity misleading.
Stop when the specified amount or level has been reached.
If media enters the standpipe, stop loading. Use only the model manufacturer’s documented correction procedure or have a qualified technician clear and inspect the internal plumbing.
Reassemble, Backwash, Rinse, and Establish a Clean-Pressure Baseline
Remove the standpipe cover carefully so it does not fall into the pipe. Clean the valve, lid, gasket groove, and other sealing surfaces. Even a small amount of sand under an O-ring can interfere with sealing.
Replace seals that are:
- Cut
- Flattened
- Hardened
- Stretched
- Contaminated
- Otherwise unable to seat correctly
If the manufacturer permits lubrication, apply only a light film of compatible silicone pool lubricant.
Reinstall the valve or lid in its documented orientation. Confirm that ports, labels, diffuser components, standpipe connections, and internal clearances align correctly. Secure the clamp or fasteners according to the manual rather than pulling one side into place by force.
Reconnect the plumbing without using the valve, standpipe, or tank fittings as leverage.
Before restoring power:
- Confirm that the drain component is correctly installed.
- Position applicable isolation valves as documented.
- Verify that the pump is ready to prime.
- Check the lid, clamp, valve connection, unions, and plumbing joints.
- Set the multiport to the required initial position while the pump remains off.
- Make sure tools and loose parts are clear of the equipment.
- Keep the timer or automation disabled.
Restore electrical power only after reassembly and the pre-start checks are complete. Start the pump manually as directed so the equipment can be observed continuously during initial operation.
For a standard multiport system, the general sequence is:
- With the pump stopped, select Backwash.
- Start the pump as directed.
- Continue until the waste discharge or sight glass is clear, subject to the manual.
- Stop the pump.
- Select Rinse if that valve provides the setting.
- Restart and rinse to the specified endpoint.
- Stop the pump again.
- Select Filter.
- Restart and allow the system to stabilize.
Published recommendations vary from roughly two minutes to three-to-five minutes for backwashing, with different rinse durations. Clear discharge and the exact valve or filter instructions are safer endpoints than a universal timer. An installation guide, for example, uses steady waste flow and a clear sight glass as operating cues. INYOPools describes those startup cues.
Do not move a multiport valve while the pump is running. If the valve has no Rinse position, do not invent a substitute sequence from another design. Follow the instructions for that exact valve.
During startup, watch for:
- Leakage at the drain
- Water around the valve, lid, or clamp
- Drips or movement at plumbing joints
- Abnormal sounds
- Unexpectedly high or low pressure
- Weak or irregular return flow
- Media emerging from the pool returns
If anything abnormal occurs, stop the pump and use the documented shutdown and pressure-release procedure before making adjustments.
After the system stabilizes in Filter mode, record the clean operating pressure. Several commercial guides use a rise of approximately 8–10 psi above clean pressure as a general backwash trigger, but the exact filter manufacturer’s threshold should control.
Do not re-enable the timer or automation until the filter is operating normally in Filter mode, the valve position is confirmed, and no leaks, abnormal pressure, weak flow, or returning media are present.
Troubleshoot the Filter After Sand Replacement
Do not assume that every post-service symptom is caused by the replacement media. Work backward through the components and steps that could plausibly produce the problem.
Sand is returning to the pool
Stop the pump before changing valve settings. If the filter needs to be reopened, follow the model-specific shutdown, pressure-release, and draining procedure.
Investigate:
- Cracked, broken, or displaced laterals
- A damaged standpipe
- An improperly seated standpipe-to-valve connection
- Incorrectly assembled internal components
- A valve fault
- Media that entered the standpipe during loading
- Unapproved or incorrectly graded media
A damaged lateral is a common explanation, but it is not the only one. The Pool Factory associates returning sand with lateral damage and recommends inspecting the exposed internals.
The valve, lid, clamp, or drain leaks
Stop the pump and follow the documented electrical-isolation and pressure-release procedure before touching the leaking assembly.
Check for:
- Sand or debris on sealing surfaces
- A twisted, pinched, dry, or damaged O-ring
- Incorrect gasket placement
- Uneven lid or valve alignment
- Incorrect clamp orientation
- Improperly installed drain components
- Damaged sealing surfaces
- Plumbing stress pulling the valve out of alignment
Do not keep tightening a damaged clamp or distorted lid. If cleaning, correct alignment, seal replacement, and documented assembly do not resolve the leak, leave the filter out of service until it is repaired.
Pressure stays high or rises rapidly
New media does not guarantee normal pressure. Recheck:
- Whether the initial backwash was completed correctly
- Media type and quantity
- Multiport position
- Return-side valves and restrictions
- Plumbing condition
- Filter sizing and pump operation
- Pressure-gauge response
Do not repeatedly backwash or replace the media again without diagnosing the cause.
Pressure is unusually low or return flow is weak
Further system diagnosis is necessary. Low pressure or weak return flow cannot reliably be attributed to the sand alone.
Check the pool water level, baskets, valve configuration, pump priming, and the broader circulation system. Continue with the pump and filter manufacturers’ diagnostic procedures.
The pool remains cloudy
Reassess:
- Water chemistry
- Sanitizer operation
- Circulation
- Pump runtime
- Bather and debris load
- Filter sizing
- Equipment condition
Changing the media cannot correct every cause of cloudy water. Repeating the job without identifying the cause is unlikely to help.
Call a qualified pool professional if:
- Pressure release cannot be verified.
- Electrical isolation is uncertain.
- Hard-plumbed disassembly exceeds your skill.
- The tank, clamp, lid, or valve is damaged.
- Internal components are cracked, distorted, or brittle.
- Replacement part numbers cannot be confirmed.
- A leak persists after correct reassembly.
- Pressure remains abnormal.
- Media continues entering the pool.
- Plumbing or valve components must be forced into alignment.
Frequently Asked Questions
Can I use play sand or ordinary silica sand in a pool filter?
Do not use play sand, masonry sand, beach sand, or generic or ungraded silica sand.
Silica pool-filter sand may be suitable when its grade and specification are explicitly approved for the exact filter. The fact that an ordinary product contains silica does not make it acceptable filter media. Check both the filter manual and media packaging before purchasing.
How often should pool-filter sand be changed?
There is no reliable universal interval. Commercial guidance ranges from approximately three years to five-to-seven years or longer, but those estimates vary and are not a substitute for the filter manufacturer’s instructions.
Use actual filtration performance, inspection findings, and model-specific guidance. If correct maintenance restores pressure, flow, and water clarity, age alone does not prove that replacement is necessary.
How much replacement sand does my filter need?
Use the weight or fill level printed on the filter label or stated in its manual. Do not estimate from tank dimensions or another filter’s capacity.
For perspective, one illustrated Hayward S180T example uses 150 pounds, but that number applies only to that configuration. The model-specific quantity is documented in INYOPools’ replacement guide. Preserve the free space specified for your own filter.
Why is filter sand coming back into the pool after startup?
Inspect the laterals, standpipe, valve components, internal seating, and standpipe-to-valve connection. Media may also have entered the standpipe during loading, or the installed product may not meet the filter specification.
Stop the pump before moving the valve. If the tank must be reopened, isolate it and release pressure according to the exact manual before removing the clamp, valve, or lid.
What if my top-mounted filter is hard-plumbed without unions?
A top-mounted valve may need to be lifted away from the standpipe. Rigid plumbing can prevent that movement, and a system without unions may require PVC cutting and later reconnection. Commercial service guidance notes this possibility for hard-plumbed top-mounted filters.
Do not bend the pipes or lever the valve upward. If you are not equipped to cut, align, join, and verify PVC plumbing, use a qualified professional.
Complete the Final Restart Check
Before considering the job complete, verify:
- [ ] The multiport valve is on Filter.
- [ ] The clamp, lid, valve, drain, unions, and plumbing are dry.
- [ ] Return flow appears normal.
- [ ] No media is emerging from the pool returns.
- [ ] Operating pressure is stable.
- [ ] Clean-filter pressure has been recorded.
- [ ] The timer or automation was re-enabled only after normal operation was confirmed.
- [ ] Water clarity and chemistry will be monitored.
The central rule is simple: safe media replacement is model-first, not generic. Finish only after the specified media has been loaded, the standpipe and laterals remain intact, startup has followed the exact manual, the valve is back on Filter, and the system operates without leaks, returning sand, weak flow, or abnormal pressure.
If pressure cannot be released, plumbing must be cut, internal parts are damaged, or leaks persist, stop and use a qualified pool professional.